แสดงบทความที่มีป้ายกำกับ ssh แสดงบทความทั้งหมด

วันจันทร์ที่ 3 กรกฎาคม พ.ศ. 2560

How to enable SSH on Raspberry Pi

ENABLE SSH

As of the November 2016 release, Raspbian has the SSH server disabled by default. It can be enabled manually from the desktop:

1. Launch Raspberry Pi Configuration from the Preferences menu
2. Navigate to the Interfaces tab
3. Select Enabled next to SSH
4. Click OK


Alternatively, raspi-config can be used:

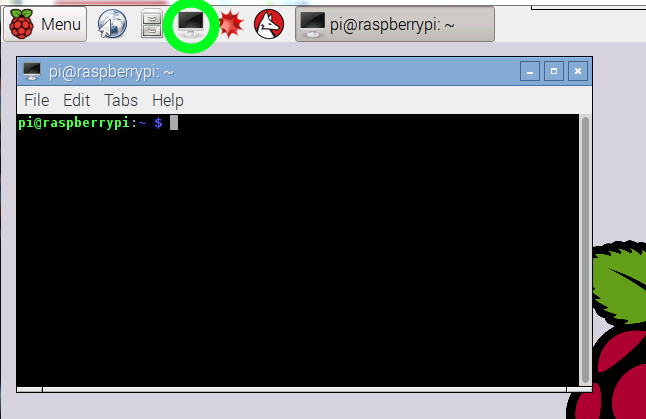
1.Enter sudo raspi-config in a terminal window
2. Select Interfacing Options
3. Navigate to and select SSH
4. Choose Yes
5. Select Ok
6. Choose Finish

Default Username & Password Raspi : pi , raspberry


Read more ...

เปิดการใช้งาน SSH บน Raspberry Pi

วิธีเริ่มต้นในการใช้งาน บอร์ด Raspberry Pi เพื่อความสะดวกในการใช้งาน โดยผ่านโปรโตคอล SSH ขั้นตอนแรก ให้เปิด Terminal ขึ้นมา

1. พิมพ์คำสั่ง sudo raspi-config


2. เลือก Interfacing Options


 3. เลือก SSH จากนั้น เลือก Yes และกด Ok


4.ทดสอบโดยการเปิดโปรแกรม Putty และ SSH เข้าไปที่ ip address ของ raspi 


**  User & Password Default ของ Raspi : pi , raspberry
Read more ...

วันอังคารที่ 6 มิถุนายน พ.ศ. 2560

Install SSH on Ubuntu 16.04

1.1. การติดตั้ง SSH 

คำสั่ง : sudo apt-get install ssh


1.2 การเปลี่ยน Port SSH 
การเปลี่ยน Port SSH จากค่า Default เพื่อเพิ่มความปลอดภัยให้กับการเชื่อมต่อ 

คำสั่ง : sudo nano /etc/ssh/sshd_config


เปลี่ยนค่า Port ที่ต้องการ เช่น Port 222


1.3 การเพิ่ม User

คำสั่ง : sudo adduser “Name User”

ตัวอย่าง : sudo adduser Test


1.4 การกาหนด User การกาหนด User บางคนให้สามารถใช้งาน SSH 

คำสั่ง : sudo nano /etc/ssh/sshd_config

หลังจากที่ใส่คาสั่งเรียบร้อยแล้ว ให้ทาการเพิ่ม User ที่จะอนุญาตให้ใช้งาน SSH

# เพิ่ม AllowUsers “ชื่อ User” ที่จะอนุญาต


จากนั้นให้ทาการ Restart Service SSH

คำสั่ง : sudo service ssh restart


1.5. การเปลี่ยน Password root

คำสั่ง : sudo passwd root

    Enter new UNIX password : ให้ใส่ Password ให้กับ Root
    Retype new UNIX password : ให้ใส่ Password เดิมอีกครั้ง

คำสั่ง : nano /etc/ssh/sshd_config

    แก้ไขบันทัด PermitRootLogin เป็น Yes


1.6 การสร้าง File

คำสั่ง : fallocate -l 100M ชื่อไฟล์

Ex. : fallocate –l 100M testdoc.txt


คำสั่งในการดูไฟล์ : ls –la


1.7 การส่งไฟล์

 คำสั่ง : scp -P 222 -r /home/cvladmin/send chadmin@xxx.xxx.xxx.xxx:.

   - scp คือคาสั่งในการส่งไฟล์
   - -P 222 คือ การระบุหมายเลข Port ที่จะส่งไปยังปลายทาง
   - -r คือ ส่งไฟล์ทั้ง folder

    /home/clvadmin/send คือ ที่อยู่ของไฟล์ต้นทางที่จะส่ง
    chadmin@xxx.xxx.xxx.xxx คือ ชื่อและไอพี ของเครื่องปลายทาง
    :. or :tmp คือ Folder ที่จะส่งไปยังปลายทาง


Read more ...

การติดตั้ง การปรับแต่ง SSH และการส่งไฟล์

1.1. การติดตั้ง SSH 

คำสั่ง : sudo apt-get install ssh


1.2 การเปลี่ยน Port SSH 
การเปลี่ยน Port SSH จากค่า Default เพื่อเพิ่มความปลอดภัยให้กับการเชื่อมต่อ 

คำสั่ง : sudo nano /etc/ssh/sshd_config


เปลี่ยนค่า Port ที่ต้องการ เช่น Port 222


1.3 การเพิ่ม User

คำสั่ง : sudo adduser “Name User”

ตัวอย่าง : sudo adduser Test


1.4 การกาหนด User การกาหนด User บางคนให้สามารถใช้งาน SSH 

คำสั่ง : sudo nano /etc/ssh/sshd_config

หลังจากที่ใส่คาสั่งเรียบร้อยแล้ว ให้ทาการเพิ่ม User ที่จะอนุญาตให้ใช้งาน SSH

# เพิ่ม AllowUsers “ชื่อ User” ที่จะอนุญาต


จากนั้นให้ทาการ Restart Service SSH

คำสั่ง : sudo service ssh restart


1.5. การเปลี่ยน Password root

คำสั่ง : sudo passwd root

    Enter new UNIX password : ให้ใส่ Password ให้กับ Root
    Retype new UNIX password : ให้ใส่ Password เดิมอีกครั้ง

คำสั่ง : nano /etc/ssh/sshd_config

    แก้ไขบันทัด PermitRootLogin เป็น Yes


1.6 การสร้าง File

คำสั่ง : fallocate -l 100M ชื่อไฟล์

Ex. : fallocate –l 100M testdoc.txt


คำสั่งในการดูไฟล์ : ls –la


1.7 การส่งไฟล์

 คำสั่ง : scp -P 222 -r /home/cvladmin/send chadmin@xxx.xxx.xxx.xxx:.

   - scp คือคาสั่งในการส่งไฟล์
   - -P 222 คือ การระบุหมายเลข Port ที่จะส่งไปยังปลายทาง
   - -r คือ ส่งไฟล์ทั้ง folder

    /home/clvadmin/send คือ ที่อยู่ของไฟล์ต้นทางที่จะส่ง
    chadmin@xxx.xxx.xxx.xxx คือ ชื่อและไอพี ของเครื่องปลายทาง
    :. or :tmp คือ Folder ที่จะส่งไปยังปลายทาง


Read more ...

วันพฤหัสบดีที่ 1 มิถุนายน พ.ศ. 2560

Firewall SRX1400 Session Control

1. กำหนด ค่า Time out SSH

CLI Quick Configuration

To quickly configure this section of the example:
    1. copy the following commands:set system login retry-options tries-before-disconnect 5
      set system login retry-options backoff-threshold 3
      set system login retry-options backoff-factor 10
      set system login retry-options lockout-period 4

  1. Paste them into a text file, remove any line breaks, change any details necessary to match your network configuration,
2. แก้ config Firewall ใน CLI Edittor 
ให้ลบฟังก์ชั่น host-inbound-traffic ทั้งหมด ของอินเตอร์เฟสขาภายนอก ตัวอย่าง
///////////////////////////////
host-inbound-traffic {
system-services {
https;
ping;
ssh;
snmp;
ike;
}
}
/////////////////////////////

3. เพิ่มคำสั่งในฟังก์ชั่น screen ตัวอย่าง(flood)
////////////////////////////
screen {
ids-option 1000-udp-flood {
udp {
flood threshold 1000;
}
}
Read more ...